NX Server, client: Netwerk + X11 = NX
Op afstand een programma draaien dat je niet geïnstalleerd hebt staan? Vanop een ander-dan-Linux-systeem toch een “X” sessie starten op je Linux-PC?
Op afstand, vanop je eigen pc, krijg je een venster waarin een werkelijke X-sessie opstart op de “server”. Je logt in alsof je ter plaatse een sessie opent. Je ondervindt geen storende vertraging als je het over het lokale netwerk draait, blijkbaar zuinig in keuze “wat” het doorstuurt, en goede compressie. Handige toepassing gezien van NX server en clients vanop Linux, waarbij de applicatie niet overal lokaal geinstalleerd moet worden; het gemak van een web-applicatie voor een niet-web applicatie. Allemaal op een Fedora Core, maar het bestaat voor verschillende systemen.

Te installeren:
– gebruikt ssh, dus zeker overal ssh (is zowat standaard op Linux systemen) en
– een server-deel, een client deel.
Zowel server als clients bestaan in commerciële en GPL versies.
Install op KUbuntu 7.10 (log): zie verder.
Links:
KUbuntu:
“How to install NX server and client under Ubuntu/Kubuntu Linux (revised)”, Engelstalige blog
Niet gebruikt:
Red Hat: http://linuxgazette.net/135/knaggs.html
Suse: http://en.opensuse.org/FreeNX_Server_HOWTO
Install log op KUbuntu 7.10:
Vertrek: van een KUbuntu 7.10 zonder eerdere NX installatie.
Installeer ssh en libstdc++2.10-glibc2.2. al ok veronderstel ik.
Download :
http://www.nomachine.com/download-package.php?Prod_Id=5:
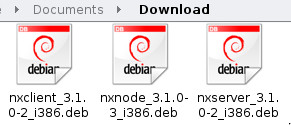 Client
Node
Server
(naar standaard map: “Download” bv)
Sluit Adept installer indien open.
Open Konqueror/Dolphin, klik op NX CLient, install
Na “All dependencies are satisfied” melding, klik Install…
Selecting previously deselected package nxclient.
(Reading database … 99990 files and directories currently installed.)
Unpacking nxclient (from …/nxclient_3.1.0-2_i386.deb) …
Setting up nxclient (3.1.0-2) …
Showing file: /usr/NX/share/documents/client/cups-infoCUPS Printing Backend
The NX Client set-up procedure detected that your “IPP CUPS” printing
backend doesn’t allow printing from the NX session. In order to have
printing support in your NX system, you need to set proper permissions
on the IPP backend. Please execute:chmod 755 /usr/lib/cups/backend/ipp
Open Konqueror/Dolphin, klik op NX Node, Install package,
(Reading database … 100157 files and directories currently installed.)
Unpacking nxnode (from …/nxnode_3.1.0-3_i386.deb) …
Setting up nxnode (3.1.0-3) …
NX> 700 Starting: install node operation at: Mon Jan 21 16:18:43 2008.
NX> 700 Autodetected system ‘debian’.
NX> 700 Install log is ‘/usr/NX/var/log/install’.
NX> 700 Creating configuration in /usr/NX/etc/node.cfg.
NX> 700 Inspecting local CUPS environment.
NX> 700 Generating CUPS entries in: /usr/NX/etc/node.cfg.
NX> 700 WARNING: Cannot find file: printers.conf.
NX> 700 WARNING: Please verify your CUPS configuration.
NX> 700 Installation of NX node was completed with warnings..
NX> 700 Please review the install log ‘/usr/NX/var/log/install’.
NX> 700 for further details..
NX> 700 Showing file: /usr/NX/share/documents/node/cups-infoCUPS Printing Backend
The NX Node setup procedure could not detect your “CUPS”
installation: either CUPS is not installed on your system
or it was installed in a non-standard path. CUPS is needed
in order to enable printing support in your NX system.
Please note that you can enable printing support for your
NX system at any time; to do this make sure that you have
CUPS installed then run:/usr/NX/scripts/setup/nxnode –nxprintsetup
to specify the location of the CUPS root path.
NX> 700 Bye.
Cups printer geïnstalleerd en dan opnieuw: “reinstall package”
0354 files and directories currently installed.)
Preparing to replace nxnode 3.1.0-3 (using …/nxnode_3.1.0-3_i386.deb) …
Unpacking replacement nxnode …
Setting up nxnode (3.1.0-3) …
NX> 701 Autodetected system ‘debian’.
NX> 701 Update log is ‘/usr/NX/var/log/update’.
NX> 701 Updating node at: Mon Jan 21 16:40:13 2008.
NX> 701 Checking NX node configuration using /usr/NX/etc/node.cfg file.
NX> 701 Update of version: 3.1.0-3 completed.
NX> 701 Bye.
Open Konqueror, klik op NX Server
Kies “Install package”
(Reading database … 100354 files and directories currently installed.)
Unpacking nxserver (from …/nxserver_3.1.0-2_i386.deb) …
Setting up nxserver (3.1.0-2) …
NX> 700 Installing: server at: Mon Jan 21 16:46:58 2008.
NX> 700 Autodetected system: debian.
NX> 700 Install log is: /usr/NX/var/log/install.
NX> 700 Creating configuration file: /usr/NX/etc/server.cfg.
NX> 723 Cannot start NX statistics:
NX> 709 NX statistics are disabled for this server.
NX> 700 WARNING: Error when trying to connect to NX server. Error is:
NX> 700 WARNING: ssh: connect to host 127.0.0.1 port 22: Connection refused
NX> 700 WARNING: NX has been configured to use the SSH server on default port
NX> 700 WARNING: 22 but no SSH daemon is listening on this port. When the
NX> 700 WARNING: installation completes, please ensure that SSHD is installed
NX> 700 WARNING: and is up and running. If you want to contact SSHD daemon on
NX> 700 WARNING: a port different from 22, you need to configure NX Server and
NX> 700 WARNING: Node accordingly. More information is available on the NoMachine
NX> 700 WARNING: Knowledge Base at: http://www.nomachine.com/kb/index.php
NX> 700 Installation of NX server was completed with warnings.
NX> 700 Please review the install log ‘/usr/NX/var/log/install’
NX> 700 for further details.
NX> 700 Showing file: /usr/NX/share/documents/server/install-noticesServer keys
The initial login between client and server happens through a DSA key
pair, i.e. a couple of specially generated cryptographic keys, called
the private key and the public key, which allow you to establish a
secure connection, by means of SSL encryption, between NX client and
NX server.The public part of the key-pair is provided during the installation
of the server, while the private part of the key-pair is distributed
together with the NX Client. This ensures that each NX client is able
to authenticate to the server and to start the procedure for autho-
rizing the user and negotiating the session.If you want to create a virtual private network (VPN) instead, you
need to generate a new DSA key-pair and distribute the private part
of the key-pair to those NX clients you want authenticated to the NX
server. More information on how to generate and distribute a new DSA
key-pair is available at:http://www.nomachine.com/ar/view.php?ar_id=AR01C00126
Creating Users
NX is configured to allow access from any system user, as long as
valid credentials are given to the user for the SSH login. NX pro-
vides an alternative authorization method, allowing system admin-
istrators to determine which users are given access to the NX fun-
ctionalities. This works by implementing a separation between the
system password and the NX password, so that, for example, it is
possible to forbid remote access to the system by any other means
except via NX and use the NX tools to implement effective accounting
of the system resources used by the user, or to share NX passwords in
an external database.To activate the NX user and password DBs, you will have to edit the
NX server configuration file by hand or use the NX Server Manager
Web tool available for download on the NoMachine Web site at:http://www.nomachine.com/download-manager.php
Session Shadowing and Desktop Sharing
The session shadowing functionality allows you to share NX sessions
running on the node. The desktop sharing functionality instead, gives
access to the native display of the X server as if you were in front
of the monitor. By default you can access sessions in interactive mode
and upon authorization of the session owner. You can modify this beha-
viour by tuning the server configuration according to your needs, for
example by allowing access to sessions in view-only mode, or connecting
to either a suspended session or the local display via the Desktop
Manager login window.Load Balancing
NX Advanced Server provides support for multi-node capabilities and
load balancing. In its current implementation, NX server can only
manage accounts on the host machine, so to grant access to the node
running remotely, you will need to create the user account directly
on the remote node host by issuing the NX node commands as root user.
You will also need to add the NX Server public DSA Key to the node to
allow this server to connect to the node running on the remote host.Documentation
For further information on how to manage the configuration of your
NX system, please refer to the System Administrator’s Guide available
on the NoMachine Web site at:http://www.nomachine.com/documentation/admin-guide.php
The NoMachine Team.
NX> 700 Bye.
SSH niet aanwezig?
$ sshd
The program ‘sshd’ is currently not installed. You can install it by typing:
sudo apt-get install openssh-server
bash: sshd: command not found
Dus:
$ sudo apt-get install openssh-server
Reading package lists… Done
Building dependency tree
Reading state information… Done
Suggested packages:
ssh-askpass rssh molly-guard
The following NEW packages will be installed:
openssh-server
0 upgraded, 1 newly installed, 0 to remove and 0 not upgraded.
Need to get 247kB of archives.
After unpacking 655kB of additional disk space will be used.
Get:1 http://security.ubuntu.com gutsy-security/main openssh-server 1:4.6p1-5ubuntu0.1 [247kB]
Fetched 247kB in 0s (302kB/s)
Preconfiguring packages …
Selecting previously deselected package openssh-server.
(Reading database … 100407 files and directories currently installed.)
Unpacking openssh-server (from …/openssh-server_1%3a4.6p1-5ubuntu0.1_i386.deb) …
Setting up openssh-server (1:4.6p1-5ubuntu0.1) …
Creating SSH2 RSA key; this may take some time …
Creating SSH2 DSA key; this may take some time …
* Restarting OpenBSD Secure Shell server sshd [ OK ]
Uit luiheid heb ik altijd Midnight Commander geïnstalleerd staan (mc, zie elders op deze blog), dus ik open een commando-venster en tik:
sudo mc
Ik beweeg naar de directory met de instellingen:
cd /etc/ssh/
en open daar het ssh_config bestand. Of beter, bewaar of kopieer het naar de /usr/NX/home/nx/.ssh/ directory.
Open het dan en voeg de lijnen toe:
AuthorizedKeysFile /usr/NX/home/nx/.ssh/authorized_keys2
Bewaar (in mc met F2), en verlaat de tekst (mc: F10).
Kijk of de server draait met sudo /usr/NX/bin/nxserver –status
~$ sudo /usr/NX/bin/nxserver –status
NX> 900 Connecting to server …
NX> 900 Warning: Permanently added ‘127.0.0.1’ (RSA) to the list of known hosts.
NX> 110 NX Server is running.
NX> 999 Bye.
Dan kan je instellen in het configuratiebestand
/usr/NX/etc/server.cfg
dat al het verkeer versleuteld moet verlopen:
ENABLE_UNENCRYPTED_SESSION = “0”
en dat oude sessies die niet gesloten werden automatisch worden afgesloten als de server zijn capaciteit bereikt heeft:
ENABLE_AUTOKILL_SESSIONS = “1”
Voor de “node” is er ook een config file:
/usr/NX/etc/node.cfg
Daarin komt nog eens die versleuteling voor:
ENABLE_UNENCRYPTED_SESSION = “0”
Tot zover de server.
(wordt vervolgd: de clients zijn nog gemakkelijker!)


